Freezer Meals for Matt: Back in the Game

So, Summer isn’t the greatest time for freezer meals.  Matt didn’t really want hot food, when the weather is hot.  Totally understandable, and summer is usually pretty busy for me anyway, so it kind of worked out nicely.  Well, now that it’s getting colder it’s time to make more meals!!!

For some reason, I can’t find any of the pics from the meals I made so I’m just going to list them all off, and let you know my changes 🙂

Cauliflower Bake:

This one was really good.  I like the idea that not every casserole has to involve pasta!  For this recipe, I followed it exactly and didn’t change a thing.  If I make it again, I might change the veggies or make it fajita flavored with onions, peppers and chicken.

Bacon Corn & jalapeno Pasta:

My husband really liked this one!  He’s big on HOT, he’ll add hot sauce or jalapenos to anything; so when I found this I knew he would like it.

I changed things a little…  I added cooked, cubed chicken.  Switched the Orzo pasta to Penne to add volume.  I might have added extra jalapenos and garlic to add more flavor.

Crazy Good Casserole:

Another really good one!!!!  The only thing I changed was the soup; I used Campbell’s Heart Healthy Cream of Chicken instead…  I like to save calories where ever I can, basically so I can eat dessert 🙂  I did think it was a little too garlicy, so 1 TBSP might be a little much.

Easy Beef Stroganoff:

Every so often, I ask Matt what he wants for meals and I always get the same response… “I don’t care, I like whatever.”  That is until this past weekend, he says Beef Strogonaff!  Most of the meals I make are things that sound good to me, even though I’m making them for Matt.  I find recipes on Pinterest that I’d eat, with ingredients I like.

Beef Strogonaff is NOT one of those things.  I hate mushrooms, so I never even thought about making this for Matt, who LOVES mushrooms!  So being the good wife I am, I made it for him…  quite honestly the smell emanating from the crockpot made me nauseated.

I didn’t change anything with this recipe 🙂

Gnocchi, Spinach, & Sausage Soup:

OMG!!!!!!!!!!!!!!!!!!!!!!!!!!!!!!!!!!!!!!!  Amazing!!!!!!!!!!!!!!!!!!!!!!!!!!  I am not the best with adjectives, so I use exclamation points to get my point across 🙂

This is such a great soup!  I changed very little of this recipe; basically I added extra peppers, spinach and sausage.  When it comes to soup and casseroles, I rarely pay attention to amounts and add everything to my liking.  I also didn’t add the Half-and-Half, I didn’t think it was necessary… leaving out the cream made it a broth soup rather than a creamy soup.

BBQ Chicken Pizza Soup:

I pretty much stuck to the recipe on this one.  I believe I added some extra BBQ sauce, I didn’t think 1/2 C. was enough, but that’s just me 🙂   It really just tastes just like BBQ Chicken Pizza!

Baked Pasta with Spinach & Ricotta:

Another winner!!!!  I added cooked sausage to the pasta sauce to add a meat to this meal.  I unfortunately forgot parmesan cheese at the store, so my ricotta mixture didn’t have any; it tasted fine without it but I think for next time I’ll make sure I get it.

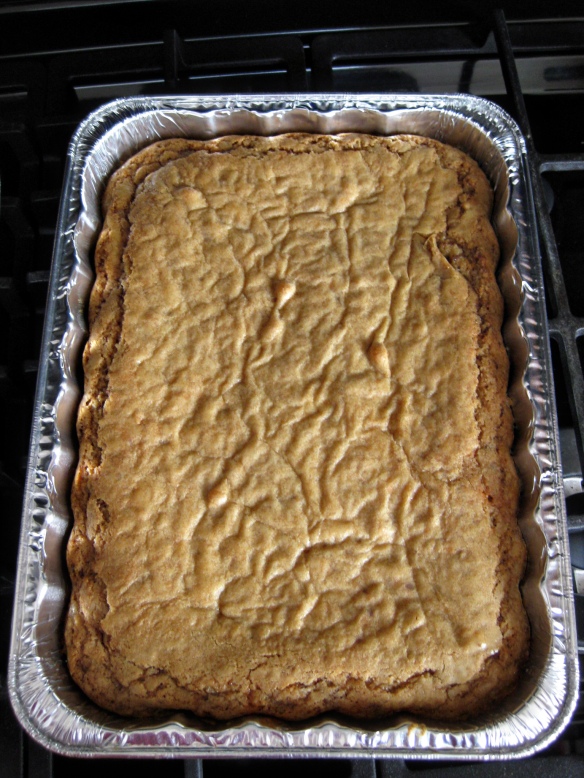
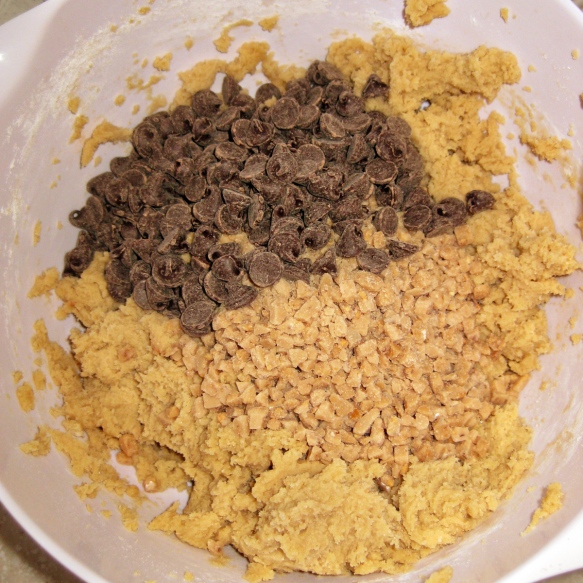
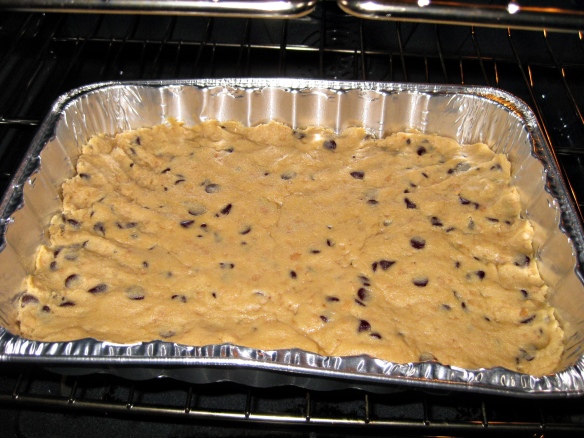
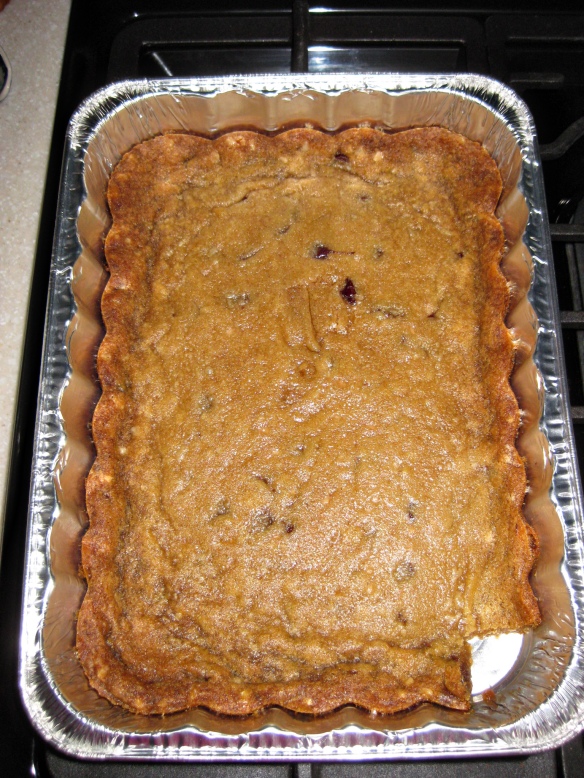
Apple Toffee Blondies:

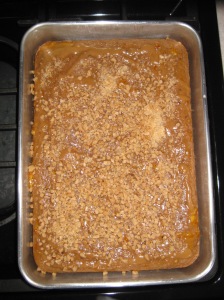
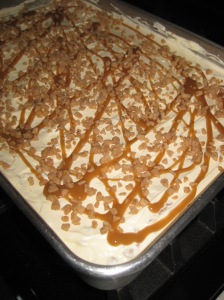
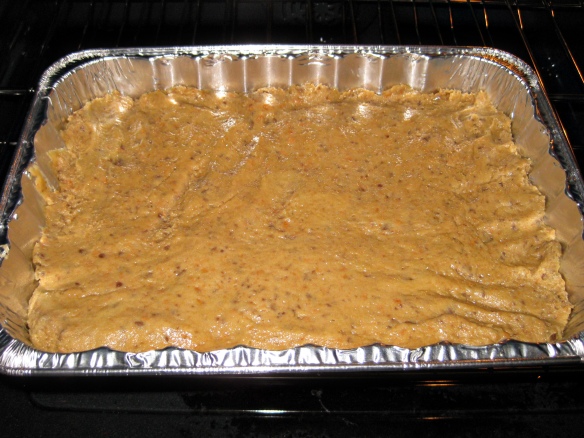
Saved the best for last…  no seriously!!!  These never actually made it to its intended destinations, TWICE 🙂  About a month ago, when it was starting to become fall I decided to do a bit a baking.  I tested this (just a little corner piece) to make sure it was ok to take to work, and half a pan later realized it was staying home 🙂  I made it again, knowing how good it was, thinking I’d take it to work, and once again my family and I consumed it before the weekend was over 🙂

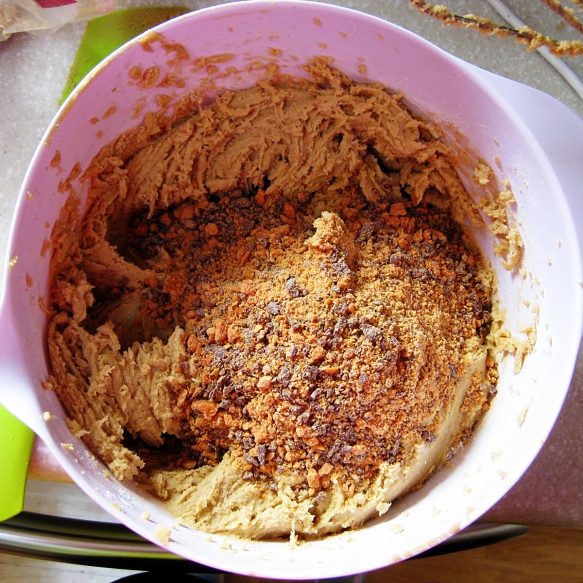
The only thing I changed was the amount of apples, I didn’t think 1 apple was enough… so I went with 2.  I also made the mistake of grabbing the Health candy bar bits with chocolate; I didn’t realize they made just toffee bits…  they tasted really good so I didn’t think anything of it until I saw them at Target 🙂  Next time I’ll make them with the toffee bits instead of the candy bar bits.

4th of July: Food, Fun & Footfalls

We enjoyed a wonderful 4 day weekend at the lake over the holiday!  Matt and I both had Friday off so we were able to spend the long holiday together (which I can’t even tell you the last time we were in the same place for 4 whole days).

Melvin really enjoyed the car ride up to the lake 😉

We got to the lake late Wednesday night and enjoyed some food and drinks with our family and friends before heading to bed. I’m kind of a loser at the lake or on vacation in general.  I like going to bed at a reasonable time in order to get up at a decent time, so I can enjoy the WHOLE day.  I don’t like sleeping until 11 or staying up til 2am, it throws off my whole schedule, plus sleeping in just wastes sunshine hours.

Thurday morning, I went for a great 4 mile run.  It’s so refreshing running at the lake and I enjoyed every minute (of my 32 minute run… 8 min/miles!!!!!!!!!!!!!!!!!!!!!!!!!!!!!!!!  can you tell I’m pretty proud??  and I got the same time as Matt 🙂 ).

We enjoyed laying out and boat rides all day Thursday and Friday!  I read a few good books The Heist, Second Honeymoon, & Now You See Her, and enjoyed the sunshine (with SPF 30 🙂 ).

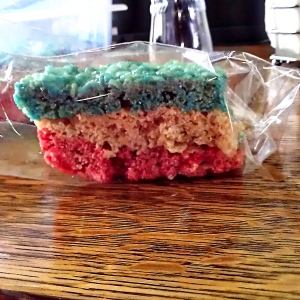
Holidays aren’t the same without treats, Right?!  I made 2 different kinds; S’more Rice Krispie treats for us and then 4th of July Rice Kripsie Treats for the party!

IMAG0437mlFor the 4th of July Rice Krispie Treats; each layer needs:
5 C. Rice Krispies

3 TBSP butter

1 bag marshmallows

Melt butter and marshmallows (for red and blue layers, add 30 drops of food coloring), stir in cereal.  Press into sprayed 9×13″ pan, making sure layers are even.

We had a great holiday weekend!  I think we often forget that 4th of July and other holidays come at a price and that we are lucky to be able to have these parties and gatherings.  I’m thankful for everyone involved in the military who makes everything we do in America possible. I hope everyone had a safe and happy holiday!

The Many Faces of Rice Krispie Treats

We had a family reunion a few weekends ago, and I (like usual) signed up to bring dessert.  I had no idea how many people were going to be there, so I wasn’t sure if 1 pan would be enough… did I need 2?  But then of course looking through all of my pinterest recipes I couldn’t decide, cause they all looked so good!

I really wanted to make something easy, that didn’t need a lot of ingredients and looked/tasted complicated 🙂  I decided on 3 different kinds of Rice Krispie Treats, all super easy but sounded really good!   Caramel Stuffed Rice Krispies, Chocolate Coconut, & Strawberry Shortcake.

Umm, let me just say that these are all really good and you can’t eat just one of each… 😉

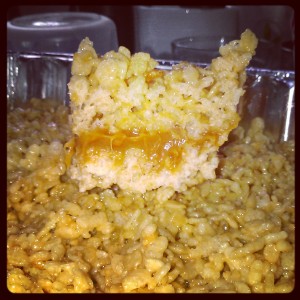
Caramel Stuffed Rice Krispies

Layers 1 & 3:

**total amounts listed, you’ll need to 1/2 the recipe for each layer**

1 box Rice Krispie cereal

2 bags marshmallows

6 TBSP butter

Layer 2:

1 – 14oz. can Sweetened Condensed Milk

1 – 14oz. bag caramels, unwrapped (not sure if I really need to mention that, but not everyone is the brightest crayon in the box… 😉 ).

1/2 C. Butter

Layer 1:

Prepare 9×13″ baking pan.  In large pan, melt 3 Tbsp. butter and 1 bag of marshmallows over low heat; pour in 1/2 box cereal (approx. 5 cups).  Mix until cereal is evenly coated.  (I like to keep the pan on the stove to keep the marshmallow mixture warm, makes it easier to mix together).  Press into prepared pan.

Layer 2:

In saucepan over low/medium heat, melt caramels, butter and milk.  Pour over layer 1; refrigerate until set (approx. 30 min.).

Layer 3:

Repeat layer 1 🙂

**to be honest I think the caramel layer is a little thick.  Layer 2 could easily be halved or you can just make 2 pans of bars; who keeps a half can of sweetened condensed milk? 🙂 **

IMG_20130622_181257

Strawberry Shortcake Rice Krispies

1 box Rice Krispie cereal

1 1/2 bags strawberry marshmallows

**if you can’t find strawberry marshmallows, use regular and then add 1 box sugar-free strawberry Jello powder**

4 Tbsp. butter

1 small package strawberry flavored dried cranberries (optional)

**I couldn’t find these, but I believe they would have made a great addition**

1+ C. white cake mix

**the original recipe calls for angel food cake mix, however the box I grabbed had 2 packets and it really threw me off, which is why if I make it again I’ll use white cake.  Also I couldn’t really taste the cake flavor, so I’m not sure if it’s necessary or not**

Prepare 9×13″ cake pan.  In large pot over low heat, melt butter and marshmallows.  Pour in cereal, dried cranberries and cake mix; stir until well combined.  Press into prepared pan.

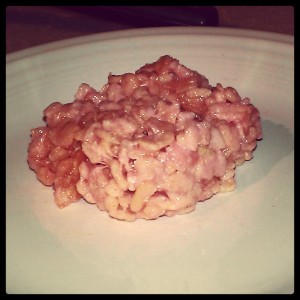
IMG_20130622_181902Unfortunately it didn’t photograph well, and it kind of looks like brains…  On a positive note, they were really good 🙂

I’m not going to do a tutorial on the Chocolate Coconut Rice Krispies cause I didn’t change anything and I forgot to take a picture 🙂

Enjoy!!

Snacks & Sweets & Memorial Day Eats

Yes, I realize Memorial Day was a month ago…  But better late than never, right? 😉

Anyway, like I stated in the Memorial Weekend Fun post, we spend the holidays with family friends.  Two of the girls live out-of-state (NY and TX), I texted the girls to find out what they want for food when they came home.  Knowing what it’s like to be away from home and really wanting certain foods when you come home, I was happy to oblige the girls’ requests 🙂

Anne wanted Fruit Pizza, and Liz wanted Oreo Balls!

For the Fruit Pizza, I used the Sugar Cookie Bar recipe and pressed it into a cookie sheet so it was thinner (and then baked it a little less than the recipe).  Then, after it cooled I spread it with a store bought fruit dip and topped it with cut fruit (strawberries, blueberries, raspberries, kiwi, and oranges).  So good and so easy!

The Oreo Balls were a completely different story… you know how I feel about my balls!  I just can’t help but make more flavors!!!  And this new one is a real keeper, and I don’t know why I never thought of it before!!!

Blueberry Cheesecake Oreo Balls

IMAG0373ml

These are made the same way as the other Oreo balls I make, just with different ingredients 🙂

1 package Golden Oreos (or vanilla sandwich cookies)

1/2-1 C. Graham cracker crumbs

**start with 1/2 C. graham crackers, add more if the dough is too soft and doesn’t form balls well**

1-8 oz. container Blueberry cream cheese

2 TBSP Powdered Sugar

2 tsp. Vanilla extract

Vanilla melting wafers

**you can use purple or blue if you’d like, to make them more festive** 🙂

Another favorite recipe that I love to bring to holidays, is Caramel Chex Mix!!!  I’m letting you know now that it’s incredibly addictive, so don’t blame me… I warned you 🙂  I got this recipe from a co-worker and I’ve modified it just a little, adding my own little spin on it 🙂

Caramel Chex Mix

1 box Rice Chex cereal

2 C. Almonds (optional)

**you can use Oven Roasted, Sea Salt, Honey, etc.**

1-2 pkgs. Dried Cranberries (optional)

1 C. butter

2 C. Light Brown Sugar

1/2 C. Light Corn Syrup

1/2 tsp. Baking Soda

1 tsp. Vanilla

Paper Bag

Parchment/Wax paper

1.  Pour cereal, almonds and cranberries into paper bag and mix well.

2. In saucepan, mix together butter, brown sugar and corn syrup.  Bring to a boil for 1 minute and then remove from stove.  In a small bowl, combine vanilla and baking soda; add to caramel mixture (it will foam up) and stir.

3.  Pour caramel over cereal mixture and shake to coat. Microwave for 4 minutes, shaking to mix every minute.  Cool on wax paper lined cookie sheet; store in air-tight container.

Yet Another Snow Day = Yet Another Bake Day

So we had a snow day in April and another today, it’s May 2nd…  Seriously MN????  I am seriously considering moving back to FL 🙂  It’s funny, over the weekend it was 75* and sunny.  Gorgeous weekend, just absolutely beautiful!!!!!!  And now it’s snowing…

I found these memes on Pinterest and thought I’d share:

If we are going to have winter 8 months out of the year, we need to have a sense of humor, right?  🙂  I have decided I’m not putting away any of my winter clothes, you don’t know when winter ends or begins; always be prepared 🙂

Anyway, since we had the day off from work, I thought I would make something for my co-workers.  I made a status on Facebook stating as much and one of my co-workers commented: Did you know that sometimes we just pretend to close but we all go in? That way we get treats the next day. Clever huh?

I wouldn’t be surprised…  they love free food and goodies and they know I’ll make something if we have a Snow Day 🙂

So what did I make, you might ask?

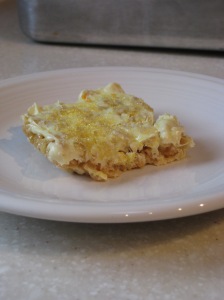
S’more Puppy Chow & Lemon Rice Krispie Bars!!!!!!  Both were absolutely wonderful and delicious!!  I made a few changes and here are my versions:

S’more Puppy Chow

1 box Golden Graham cereal

1 bag mini Marshmallows

1 bag chocolate chips

Powdered Sugar

In large bowl (or 2 medium bowls 😉 ; try to use bowls with lids, otherwise use gallon size ziploc bags), combine cereal and marshmallows.  In microwavable bowl, melt chocolate according to package; pour over cereal mixture and coat well.  Sprinkle powdered sugar over top, snap on lid and shake!!!!!!!!!

It’s so good, and super addictive; try not to eat it all!

Lemon Rice Krispie Bars

1 box Rice Krispie cereal

1.5 bags mini marshmallows

4-6 TBSP butter

1 box lemon sandwich cookies, crushed

2 TBSP lemon juice

1 TBSP lemon zest

Lemon Frosting (optional)

1. In large stove top pan on low heat, melt butter and marshmallows.  Add lemon juice and zest.

2.  Mix in cereal and cookies (I like to mix it while on the stove cause it stays hot and it’s easier to mix).

3. Press mixture into sprayed 9×13″ pan (I always spray my hands so the bars don’t stick to my hands 🙂 ).  When cooled, spread frosting over top if you want and enjoy!!! 🙂

IMG_2782

This morning I took Melvin outside… When the snow is much taller than you, it can be rough.  He peed right outside the house and when I tried to take him futher out, he hid under my car 🙂

IMAG0349 IMG_20130502_072830 You know, even though it’s May it’s really pretty out!

IMG_20130502_081406

Hoppy Easter!!

Hoppy Easter!  (see what I did there?  betcha never heard that one before 🙂 ).

I decided to try out a few new things for this year’s Easter!  Just to warn you, I tried out a lot of new things, and therefore this post is a little long…. 🙂

Permanent Marker Eggs!  I saw on pinterest an idea to use permanent markers to decorate eggs.  Duh, why didn’t I think of that sooner.  Not going to lie, I’m not a huge fan of getting dirty and dyeing eggs isn’t always the cleanest… So I opted for the cleaner version 🙂

Buffalo Chicken Dip: This is not new to me, however it was new to everyone else at Easter.  It’s so addictive and I love it; it’s probably one of my favorite appetizers/dips! Because of the amount of people at Easter I made 1 1/2 Xs the regular amount… and like majority of my recipes, this can be adjusted per your liking (Buffalo sauce, ranch and cheese amounts can vary).

2- 8oz. pkgs. Low Fat Cream Cheese, softened

1 C. Fat Free Greek Yogurt

**you can replace all the cream cheese for Greek Yogurt, do half and half but there should be 24 oz. of some kind of creamy substance… you choose 🙂 **

1/2-3/4 C. Buffalo Sauce

1/2-3/4 C. Ranch dressing

2 C. Shredded Cheddar Cheese

2-4 cans shredded chicken

Mix everything together and either, throw into a crockpot on low for 30-60 minutes or oven at 350* for 30 min (and honestly it tastes good cold as well! 🙂 ).  Serve with Chips, Celery, Crackers, etc 🙂

Carrot Cake Puppy Chow (or muddy buddies for those of you who don’t live in the Midwest… 🙂 ).  Can you say ADDICTING??????  I’m not a huge Carrot Cake person but this was fantastic!!!!  I found a few different ways of making this on Pinterest and decided to make it my way 🙂

1 box Chex Cereal

3/4 bag White chocolate chips

1/2-3/4 C. Carrot Cake mix

Melt chips, pour over cereal, shake in cake mix!  Easy and delicious!!!!!!!!!!!!!!!!!!!!!!!! 🙂

Bunny Cookies:

IMG_2752ml

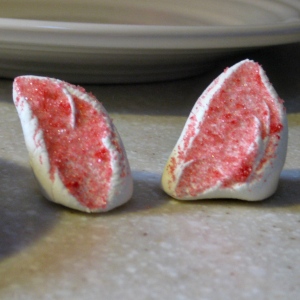
Aren’t those the cutest??? I was so proud of myself for coming up with this!  First I made the ears (because you need to put them on the cookie AS SOON as they come out of the oven, I learned that the hard way, which is why only a few turned out…)

Ears

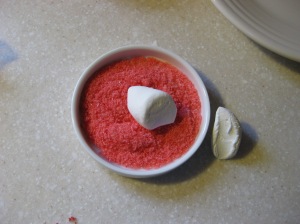
Marshmallows (cut diagonally)

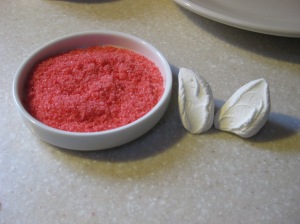
1/4 C. Sugar + 2 drops Pink food coloring = colored sugar

IMG_2747Place Marshmallow, cut side down, in sugar.

IMG_2748And Voila… Ears!!

IMG_2751ml

Sugar Cookie

3 1/2 C. flour

1 1/2 tsp baking powder

1 1/2 C.butter, softened

1 cup sugar

1 egg

1 tsp vanilla

1. Preheat oven to 350* and prepare a cookie sheet.

2. Cream together, butter and sugar; add egg and vanilla.  Mix in flour and baking powder until combined.  Use a cookie scoop, use about a scoop and a half to form the dough into balls.

3. Place onto cookie sheet and flatten slightly (if they are too thin it’s hard to smoosh the m&m eyes/nose on and the ears).  Bake 8 min. (and no longer, and I mean it… second mistake was cooking them longer cause they seemed too soft, well soft is what you want when smooshing things into cookies 🙂 ).

4. As soon as the cookies are out of the oven, gently press ears, eyes and nose into cookies.  The marshmallows will melt nicely and adhere to the cookies 🙂  Leave on cookie sheet to cool, then gently remove and ENJOY!!!!

Better-than-you-know-what Carrot Cake:  I found a couple of recipes online for this, but after reading the ingredients, I decided I didn’t like them and made up my own…  there might be a pattern with me and recipes 🙂

1 box Carrot cake mix

1 can diet Cream Soda (or any diet clear pop)

**you can either make the cake with pop or just make like you normally would with eggs, oil and water**

Sugar Free Caramel Topping

Toffee bits, divided

Sugar Free Orange Marmalade (optional)

Cool Whip Cream Cheese frosting

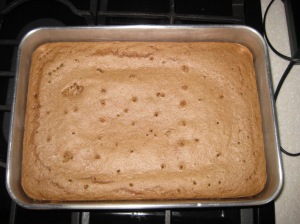
1. Mix together cake mix and pop and bake according to package. Let cool approximately 5-10 min. (however, if you forget and walk away for a long period of time, have no fear it’s not going to ruin the dessert 😉 ).

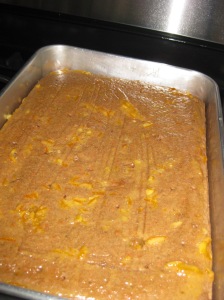
2. Poke holes in cake, spread orange marmalade over top.  Drizzle caramel topping over top and then sprinkle with toffee bits.  Allow cake to cool completely.

IMG_2758IMG_2760IMG_27623. Carefully, spread frosting over top (I often put dollops around the cake and then spread together…).  Drizzle with more caramel and sprinkle with remaining toffee bits.

IMG_2764

Hope you all had a wonderful Easter!!!!

Another Snow Day = Another Bake Day

I am so over winter!!  I wouldn’t mind winter if it only went from December til February… but in MN it doesn’t.  Winter can be anywhere from October til April (true story, my 21st Birthday, it was sleeting… it’s at the end of April).  I’m not completely against Winter, I just don’t believe in it lasting too long.  And by now it has completely out-stayed its welcome…  It’s the middle of March for goodness sakes!!!!!!!

Anyway, enough negativity…  the day off provided me with time to bake some goodies for my fabulous co-workers!

I decided on:

 Butterfinger Blondies, Chocolate Toffee Blondies & Sugar Cookie Bars

Drooling Yet??!!!!?  🙂  And, I made it all in under 2 hours, prep and bake times!

Butterfinger Blondies

2 1/4 C. flour

1 tsp baking powder

1/4 tsp salt

3/4 C. butter, softened (1 1/2 sticks)

2 1/4 C. light brown sugar

3 large eggs

1 1/2 tsp vanilla

1 bag bite-sized Butterfingers, crushed (I found a resealable bag, but if you can’t find that… use a half bag of fun-sized)

1.  Preheat oven to 350°F. Grease a 9×13″ baking pan.

2.  In a small bowl, whisk together flour, baking powder and salt; set aside.

3.  In a medium bowl, with electric mixer at medium speed, combine butter and brown sugar.

4.  Beat in eggs and vanilla until smooth.

5. Stir in flour mixture and crushed butterfingers; spread in prepared pan (I sprayed my hands with Pam to flatten into pan)

IMG_2730ml

IMG_2732ml

7.  Bake 30-35 minutes, or until the bars are a bit firm to the touch. Cool completely before cutting into bars. (I had to bake mine for 35 min., and next time I might even go a little longer).

IMG_2736ml

Chocolate Toffee Blondies

1 2/3 C flour

3/4 tsp baking soda

1/2 tsp salt

3/4 C. butter, softened

1 C. plus 2 Tbsp brown sugar

1 large egg

1 1/2 tsp vanilla

2/3+ C. semi-sweet chocolate chips

2/3+ C. cup toffee bits

**I went ahead and used more of the toffee bits and the chocolate chips, up to you if you would like to stick to the original recipe or add 🙂

1. Preheat oven to 350°F and prepare a 9×13″ baking dish.

2. Whisk together flour, baking soda, and salt in a medium bowl. Beat butter and brown sugar in a large mixing bowl on medium speed until light and fluffy.

3. Beat in egg and vanilla until combined. Reduce speed to low and gradually add flour mixture. Fold in chocolate chips and toffee bits.

IMG_2728ml

IMG_2729ml

4. Press batter into prepared baking dish (once again, I sprayed my hands to press it down).  Bake for 18 to 20 minutes.

IMG_2737ml

**yeah, I tried a little out of the corner 😉  pretty tasty!!!!

Sugar Cookie Bars

1 C. butter, softened
2 C. sugar

4 eggs

2 tsp. vanilla

5 C. flour

1 tsp. salt

1/2 tsp. baking soda

Frosting

1. Preheat oven to 375*; spray a deep cookie sheet (I used a disposable cookie sheet)

2. Cream butter and sugar until fluffy.  Add eggs and vanilla until well combined.

3. In a separate bowl, combine flour, salt, baking soda. Add to wet mixture and mix just until combined.

4. Press into prepared pan and bake for 10-15 min. or until light-golden and cool completely.  After cooling, spread with frosting and add sprinkles (if you wish)!

IMG_2744ml

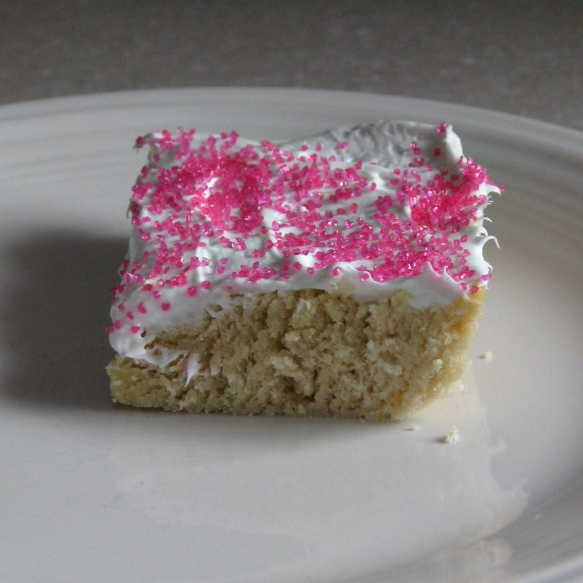
Happy Snow Day!!! 🙂  Enjoy these fabulous treats!  I have to say that the Sugar Cookie Bars are my favorite, but they are all pretty good!

Freezer Meals for Matt: Meatloaf Cupcakes

Not going to lie, I’m not quite as excited about this one as I was about the others…  Meatloaf isn’t a favorite thing of mine to begin with but thought I should change it up a little for Matt, so here it goes…

The original recipe is from Proud Italian Cook, it was a Chicken Parmesan Meatloaf.  I changed it a little cause of freezing, and individual servings…  plus I didn’t want leftover Tomato Sauce… so it’s the same but different 😉

Meatloaf Cupcakes

1 1/2 lbs. ground meat (beef, chicken, turkey… I used turkey cause it was $2 a lb. cheaper…)

1/2 Tbsp. minced Garlic

1/2 onion, chopped

2 eggs

1/2 C. bread crumbs

8 oz. can Tomato Sauce (this is where you can change things, you can use more for a topping if you choose)

1/2+ C. shredded Parmesan, Asiago cheese blend

1/2 Tbsp. parsley

1/2 Tbsp. Basil

salt and pepper to taste

1. Preheat oven to 375*, prepare baking dish (cupcake pans, bread pans, 8×8″ baking pan)

2. Mix all ingredients together, spoon into prepared baking dish.  Bake 1 hour, when there are 20 min left spoon tomato sauce over top and sprinkle extra cheese on top (if desired).

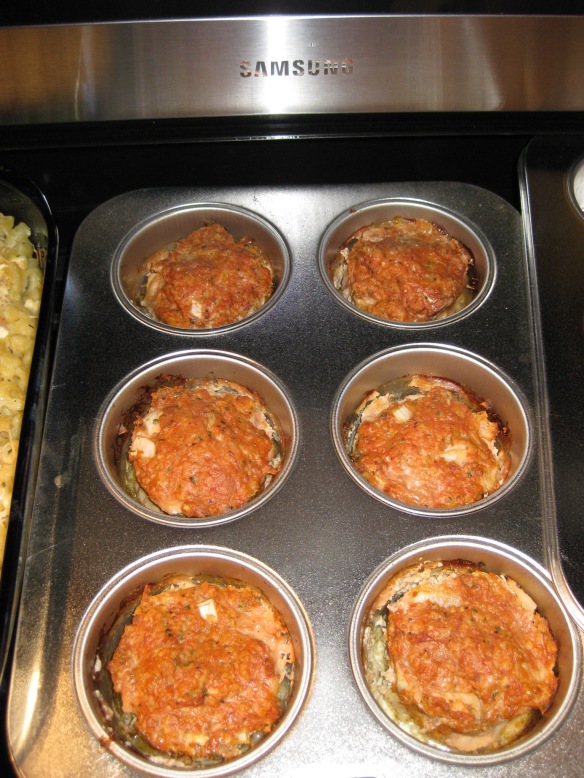
IMG_2725

I know they don’t look all that appetizing, but they smelled really good! 🙂  I promise!

Freezer Meals for Matt: Spinach Artichoke Chicken Bake

See I told you I do a lot of chicken recipes!

For this one, imagine Spinach and Artichoke Dip, but with chicken and as a meal 🙂  You know that sounds awesome!  I’ve been wanting to try this recipe for quite a while, the spinach has been in the freezer for months…  And I finally decided to make it yesterday!

The original recipe is from Add a Pinch, which also has some great recipes!  Anyway, I kept to the recipe fairly closely, not changing a whole lot.  Here’s my version:

Spinach Artichoke Chicken Bake

4 boneless, skinless chicken breasts, cubed and cooked

1 13+ oz. can Artichoke hearts, drained

10 oz. chopped, frozen spinach, thawed and squeezed

1/2 Tbsp. minced garlic

1 C. Greek Yogurt

1/2 C. shredded fresh Parmesan cheese

1 C. shredded Italian blend cheese

1. Preheat oven to 350*, prepare a 9×13″ baking dish.

2. Mix together all ingredients and pour into prepared baking dish.  Sprinkle with cheese if desired and bake for 25 min.

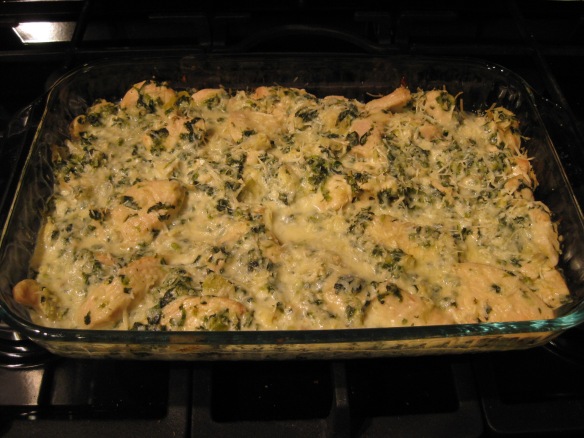
IMG_2726

So easy!  Can’t wait to make this again!  If you don’t like Greek Yogurt or prefer a creamier texture, I would switch it out for cream cheese.

For freezing information, see FAQs page.

Freezer Meals for Matt: Shrimp Feta and Herb Mac and Cheese

So glad I found this gem!  Doesn’t it sound wonderful and different?!?  And let me just express my love for Pinterest once again!  I’m sorry but I cannot stress enough, how much easier my life is with Pinterest.  I can find so many wonderful ideas and keep them in one place!  As much as I like cookbooks, I think Pinterst is just a great time saver!  Alright enough praise for Pinterest (not like it needs any…), on to a new Freezer Meal for Matt!

I feel like I’ve been doing A LOT of chicken meals.  I try to change it up with beef but it doesn’t happen very often.  I started feeling bad that all Matt’s meals were chicken, granted they were all different meals, but still chicken.  So I decided to try Shrimp, Feta and Herb Mac and Cheese, originally from Annie’s Eats (which by the way has some great recipes, and can’t wait to explore the site!!).

I however, did change this recipe quite a bit, mainly because whenever I make a roux it doesn’t seem to turn out… so I improvised and used my Mac and Cheese recipe and made it Shrimp and Feta!

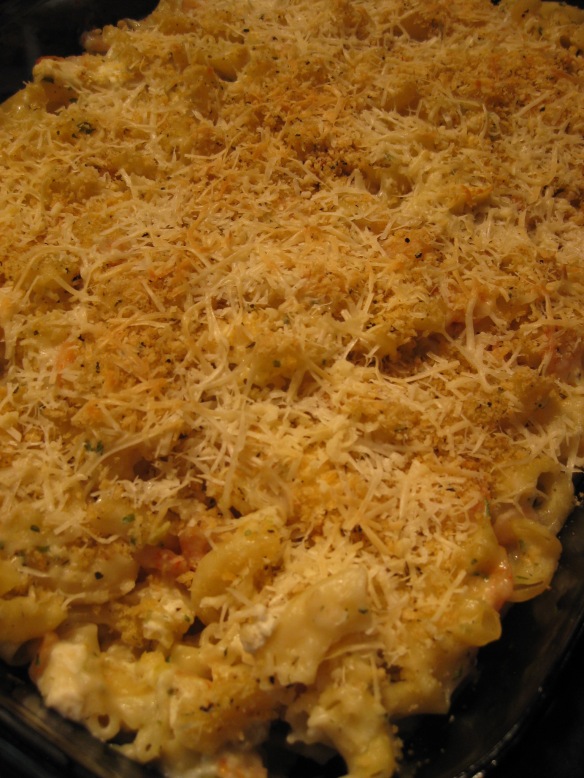
IMG_2723

Shrimp, Feta & Herb Mac and Cheese

1 lb. Box noodles, cooked and drained

1 1/2 lbs. shrimp (I used mini shrimp, but you can use medium and cut it into pieces), thawed

3 tsp. lemon zest

2 C. shredded Italian cheese blend

8 oz. Feta cheese crumbles

1 can 98% Fat Free Cream of Celery soup

1/2 C. Greek yogurt

1/2 C. bread crumbs

2 Tbsp. parsley

2 Tbsp. Dill Weed

salt and pepper to taste

1. Preheat oven to 350*, prepare a deep 9×13″ baking dish.

2. Mix together cheeses, spices, yogurt, bread crumbs, and soup.  Stir in cooked pasta and shrimp.

3. Pour into prepared baking dish, sprinkle with addition bread crumbs and cheese if desired.  Bake for 25 min.

For freezing information see the FAQs page